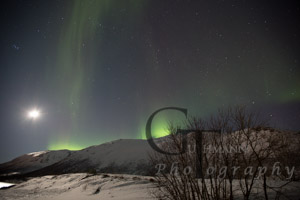
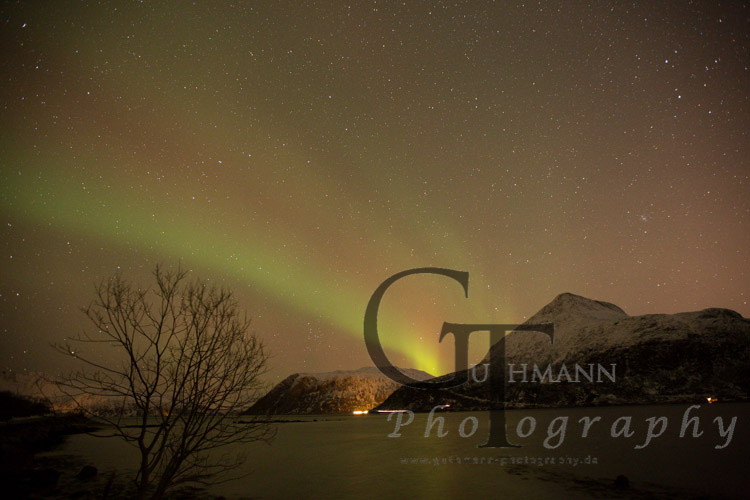
In my opinion the Northern Lights are one of the most impressive and spectecular natural phenomenons on earth and should be on everyones „bucketlist“! They are caused by sun eruptions. These solar winds travel through the outer space towards the earth and enter our home planet at the pol regions: this is where theoretical sciences creates magical lightshows on the winter nightsky.
The aim of my article is to share my personal experiences in photographing the Aurora Borealis which I made during my stay in Northern Norway. It’s all about choosing the perfect time and place but also about choosing the right gear to survive the freezing cold nights far in the north. Of course I will also include my knowledge about the different settings for your camera! I hope, with all these informations, everyone will be able to get the perfect shot of the amazing displays from the Northern Lights.
As aforementioned I learned all about the Aurora Borealis in Northern Norway or more exact in Tromsø (which calls itself „Capital of the Northern Lights“) in the beginning of January. A detailed review about my journey can be found HERE. The article is written in German but as I always say: pictures are multi-lingual! So I hope you can at least enjoy them! Moreover, if you plan to visit Tromsø, I created a map with all my photo locations, which can be found HERE.
Tromso – In search of lights from Thomas Guthmann on Vimeo.
So the question raises: that are the important facts you should think of before planning your trip in the north? Here are some points you should keep in mind:
- choose a place with more or less stable/predictable weather conditions
- choose a place with as less light pollution as possible
- choose a time with descending moonphase or even better go at New Moon (The moonlight is often much stonger as the display of the Aurora Borealis itself and gets even brighter when reflected by the snow!)
- be prepaired for long nights (The best shots I got most of the time between 9 pm and 12 am – but sometimes strong displays lasted until 4 am!)
You can see the polar lights far in the north (Aurora Borealis) or in the south (A. australis). They are twins, that means you can see the exact same display at each pol. Since you have to travel as near to the pol as possible it is easier to travel north. Nevertheless, you can see the Southern Lights also in Tasmania or New Zealand but the displays are rare and often only a faint shine on the night sky. Once I heard people say that the Southern Lights are the ugly sisters of the Northern Lights. Since I was so far never able to see the Aurora Australis I can’t judge about this!
Theoretically you can see the polar lights throughout the whole year but in the polar summer, when the sun never drops, it is covered by the sunlight. Therefore, autumn till spring is preferrable but means at the same time, that you have to deal with 0°C or less – depending on latitude, if you are at the sea or more inland! The beginning / end of the saison has the advantage that you will have some hours of daylight for other sightseeing activities since the polarnight has not started / ended already (e.g. the polarnight in Tromsø is from 26th November till 15th January).
Keeping this in mind, I would strongly recommend the following gear:
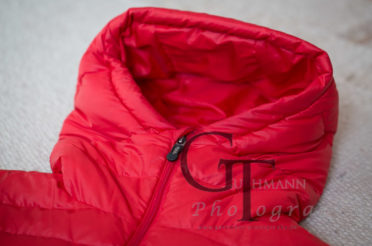
- down jacket
- padded trousers (e.g. Primaloft or down trousers)
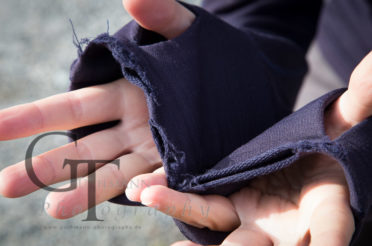
- gloves
- beanni or hat which also protects your ears or alternatively separate ear protection
- boots with really good insulation (don’t forget you will stay for hours on snow and ice)
- or buy an extra pair of insulation insoles (best with aluminium on one site and wool on the other)
- many people in Northern Norway uses extra spikes for their shoes for save walking on the icy streets
- headtorch with red light function (better for the adaption of your eyes at night)
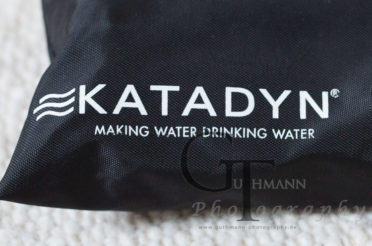
- insulated bottle for hot drinks (best for spending time outside at cold freezing nights)
- nice extra: snow shoes and hiking poles – makes it easier to reach places far from the road
Even more important as the right cloathing for photographing the Northern Lights is of course the right photo equipment:
- a tripod is essential because of the long exposure times (e.g. Sirui travel tripod)
- tripod legs should be foam-covered (if you ever touched ice-cold metal you know why …)
- wideangle lens (10 – 14 mm) or Fish Eye lens (I just had a 16 mm lens and in my opinion this was not optimal.)
- remote controller (allows you sometimes to wait in the warmer car until the Aurora starts)
- flash or torch (to illuminate persons or objects in the foreground)
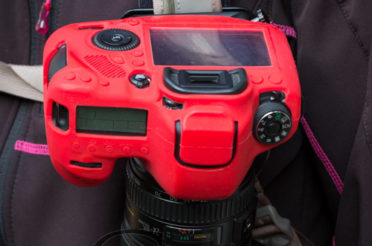
Depending if you have a wireless remote controller or not you should keep in mind that cables get quite inflexible due to the cold conditions. Additionally, the lifetime of your batteries is dramatically reduced because of an increase of the inner resistance combined with slow downed chemical reaction. An as empty shown battery often works quite well after warming it with your body heat. Therefore, spare batteries should be stored at a warm place, that means close to your body. My batteries worked for two days at moderate temperatures under 0°C. At temperatures of -16°C my batteries lost 30% of their capacity after only 30 minutes.
If you arrived at your place of choice it is essential to regular check the actual weather forecast Link as well as the Aurora forecast link. With these two tools you can decide wether you should go or if you can stay in your cozy and warm bed for this night. With the right forecasts it is time for chasing the lights!
So the question raises: How can I recognize the Auroa at the nightsky? At a forecast level of 1-2 you should look for an unusual long grey cloude, which goes over the sky like the condensations band (???) of an airplane. A test shot with your camara can erease last uncertainties and will show you, if you have spotted the polar lights or not. If the Aurora reaches level 3 and more you can see the lights clearly with your eyes. You will see the different colours of the lights (from red at the upper end of the band over green in the middle to blue at the lower end) and how the polar lights move – like they would dance high above in the sky.
Which are the best camera settings for the perfect shot of the Aurora?
First of all: get your camera and different settings known at daytime before you stand tired and freezing in the night without knowing what exactly to do. Test the different settings for your lens and how to focus for infinity. It is often helpful to take testshots of the Aurora. Always use the histogram function of your camera instead of just looking at the taken picture to judge if you have a good exposed image. Only the histogram will tell you the truth about under- or overexposed parts of your picture, which will hence be clipped off. Moreover, your eyes have already adapted for the dark and the light of the monitor is therefore way to strong for a qualified judgment.
But to make a long story short I will tell you now different values for the camera settings depending on the different Aurora level activities including the coresponding pictures as example. I personally take my pictures only as RAW-files that means the pictures are not internally processed by the camera but also that the produced data volumne is much higher. Moreover, specialized software is needed for watching and/or editing of your pictures like, for example, Lightroom.
Camera settings for photographing the northern lights:
ISO: 160 Aperture: 2,8 (or better – I only had lenses with 2,8) Exposure time: 10 seconds
It is useful to save the above mentioned values as preset for your camera. In this way you can fast and easy access the settings, which can afterwarts slightly modified depending on the different situations. If you don’t have a remote controller it is the best to program a 2 second delay for your shot to prevent unsharp pictures through shaking while you press the camera button.
Table with different values for shooting the Aurora Borealis including pictures for example:
All pictures represent unedited pictures as RAW-Files.
| Settings | Photo | Comment |
| Aurora Level 2 ISO 6400 Aperture 4 Exposure 30 Sek Focal length 24 mm |
 |
Weak Aurora, Distance, f4 needs long Exposuretime and high ISO. Everything is bright, some stars shine through |
| Aurora Level 2 ISO 3200 Aperture 2.8 Exposure 15 Sek Focal length 16 mm |
 |
Aurora can be seen more clearer than in the picture below |
| Aurora Level 2 ISO 3200 Aperture 2.8 Exposure 25 Sek Focal length 16 mm |
 |
Exposure too long, the bright background weakens the Aurora |
| Aurora Level 3 ISO 4000 Aperture 2.8 Exposure 8 Sek Focal length 16 mm |
 |
small Aurora and short exposuretime needs higher ISO |
| Aurora Level 3 ISO 5000 Aperture 4 Exposure 10 Sek Focal length 24 mm |
 |
Aurora far away and f4 –> higher ISO |
| Aurora Level 4 ISO 1600 Aperture 2.8 Exposure 8 Sek Focal length 16 mm |
 |
|
| Aurora Level 5 ISO 1600 Aperture 2.8 Exposure 5 sek Focal length 16 mm |
 |
Aurora very close –> short exposuretime |
| Aurora Level 5 ISO 1600 Aperture 2.8 Exposure 10 sek Focal length 16 mm |
 |
Aurora far away and to get the refections in the water long exposure |
If you are interested in the high-quality pictures of the Aurora Borealis, you will find them in this blog post
The pictures in the table clearly show that not only the activity level but also „the distance“ of the Aurora is important for your camera settings. An Aurora which is directly dancing over you (and looks like you already could touch it) is much stronger as one you see far away over the mountains at the horizon.
The movement of the polar lights is much faster as I was imaging. So if you which to freeze this dancing you should be aware that you have to choose exposure times under 10 seconds. Additionally, this short exposure time means that you need a stronger display to get a bright Aurora. Choosing exposure times over 10 seconds leeds to overlapping movements of the Aurora. Therefore, the band of the Aurora look softer but at the same time shines much brighter and is, therefore, suitable also for low level actitity.
Often it is quite useful to move between different locations because of upcoming clouds or for a variation of the foreground. Here it is most important to avoid condensation on your equipment! The best way to protect you camera is to pack it outside into an drysack (even better if you put some silicagel packages into the drysack) before you enter the warmer car/bus/hut/…, since the cold air in the drysack contains less moisture as the warmer air inside, and store it there until 1. you are back in the cold or 2. the whole drysack slowly warmed up completely. Ofterwise the condensation moisture can enter your camera and could freeze inside of it if you bring the camera outside again (depending on the outside temperature of course) and can damage your gear – in the worst case in a fatal way. This would be also the end of your light chasing adventure! So better well protect your gear! For the same reason avoid to breath while looking through the seeker so that no condensation moisture can freeze on your camera.
Depending on your location it is also necessary to check your lens for condensation moisture from time to time. As I was shooting the Northern Lights near to the coast, my lens showed condensation after one hour.
Nevertheless all these tipps and advices will not garantee that you will get the perfect shot. You should always keep in mind that the Aurora Borealis is an natural phenomenon and, therefore, not 100% predictable. Many factores must fit together for an unforgetable moment: a clear nightsky, less moonlight, activ sun winds, … and, of course, you must have choosen the right place to be. For example: I had a clear, cold night with no moon. The forecast level was 5, which means normally a strong display but all a saw was just a faint glimb at the nightsky… All in all I chased the lights for 14 nights. At 8 of them I was able to see the polar lights with levels between 1-5.
Last but not least: if anything is still unclear or if you still have unanswered questions concerning the polar lights and how to photograph them, feel free to leave a comment on my site or write me an email instead. Also I would be happy about feedback or if you just share your northern lights stories and/or pictures with me.
Happy light chasing!

Schreibe einen Kommentar